Showing posts with label Sewing. Show all posts

March 09, 2011

Next Pattern Donation to Pattern Rescue

As one would expect, not every pattern that I acquire for my shop is in, what I would call, sellable condition.   I typically will reject a pattern if it is missing major pieces, has no instructions or has been altered to the point that returning it to original condition is just to much hassle.
 These rejects really are not as many as one might expect; perhaps one out of  20.    As I accumulate these, I store them in a container by brand/number (sometimes missings pieces are found in the wrong envelopes).
 But, at some point, it's time to let go.   Typically when I finish processing lots that came in together.

Pattern Rescue to the Rescue .... Literally.   Pattern Rescue link

Over the last year I've sent them a bunch of my rejects and I always hope they put them to great use.   If you've not check them out, gander on over ....

March 08, 2011

Maisey, Heart Art Doll

Hi.   I'm Maisey.  Fifth in the Heart Art Doll Practice sessions.    I almost didn't come about being today when it was discovered the Current Channel on TV was  having an 'This American Life' Telethon.  But, in the end, it was set up to DVR to watch in installments.     And, here I am.
Let me tell you, it was no easy feat.  First off, although the instructions do not specifically say this, only lightweight cottons should be considered in my attire.  But, I started with a dress of medium weight cotton (seriously, one could upholster a chair with this stuff), and then to add insult to injury, a vest was added, front and back.  Now, mind, you, I know this is a semi-stylish outfit, but, my neck size is about 1" across with the opening at the top, so all that fabric from these linebacker shoulders and squared off behind, had to squeeze through my tiny neck.   That what I mean about the injury.  I was poked with pencil erasers, tugged with safety pins, and at one point, SHE even had may head clasped in her teeth while she tugged at my bottom quarters!.   I was bruised and battered and had to be steamed to get the wrinkles out.    Now, I know you think I'm exaggerating here, but LOOK AT ME.   My mouth was stretched from the petite little heart of my sisters, to these huge, tribal lips.   And, my sexy almond eyes are now flying disks.   It's almost more than I can bear.  

March 05, 2011

Tams, Heart Art Doll

Hi, I'm Tams.   I'm fourth in the Heart Art Shelf Sitter Doll practice.    And, if I can say so myself, I'm looking pretty good !


What do you think of my outfit?   Some may comment on overuse of black and orange in my wardrobe.  I could come up with some great lines .... like I bleed black and orange for my favorite team, or I'm always prepared for Halloween, but the truth is, orange matches my hair nicely and I've heard that black is very slimming.

I was placed on the table this afternoon for review and evaluation and it was suggested that my head was slightly crooked.   OMG, how cruel these humans can be !  

P.s. :  It has been decided that my (and that of my future sisters) perfect weighting factor is one and a half cups of plastic pellets.  AND, if  my sisters are going to be as overstuffed as I am (we are not calling it a weight problem), that corresponding thread must be used!

Thanks for dropping by,
Tams

March 03, 2011

More Work on the Dollies

 Presenting my second and third practice dollies. 


Now are those faces only a Mother could love, or what?  These two went better than the first.  (Isn't that the way it goes however ... with practice, they get better).    These are from the same pattern instruction set as the first .... Hearts and Bows from Divas Cloth Doll Creations.     Improvements from my first doll ..
It takes 1 1/2 cups of the plastic pellets for the bottom to support the upper weight.   When stuffing the doll, you have to hold her upright or the plastic pellets rearrange themselves up these sides and thus, make her a leaning, or on her side, doll. 
It takes at least 3 times more stuffing to fill her solid than I would have expected. 

I'm going to make a couple more.   This is a good, basic doll, for practice.   By this, I mean that the body itself takes little time to put together, allowing one to work on design of the doll features and accessories themselves.    AND, I definitely need some practice on those faces !

I'll be starting a couple more this afternoon.

February 28, 2011

Cleaning the Studio, on Advice from Singer

The beginning section of my new (used) Athena 2000 Singer Sewing Machine Manual contains this very cheery page on Sewing Room Layout.

I looked at this very sweet picture and Yes, I could certainly see the point.   It would be much more enjoyable to sew when one is not surrounded by stacks of papers, decisions awaiting completion and stuff I just don't know what to do with.   Not just sew, but just about anything would be more pleasant  than the state of my studio.    
So, all projects (or lack thereof) have come to a temporary halt.   I'm dividing it all down .... keep & put away, give away, throw away.   I'm dispensing with the stacks.   Shouldn't take more than two days !


February 26, 2011

Yard Sale Saturday, 2/26/2011 Athena 2000 Sewing Machine

It's been quite awhile since I've been out on my yard sale circle. It's been cold, and, frankly, I've just not felt like it.

But today, the sun is up and it's warm. Beau is training for the upcoming Crescent City Classic and was going on a fast walk between the two trailheads. So, I had extra time between dropoff and pickup and decided to check out a couple yard sales versus going home for 30 minutes.

AND, I'm so glad I did. I was recently pondering buying a new sewing machine, but was holding off trying to figure out what I wanted. But, that all changed when I found this beauty this morning.
 She's a Singer Athena 2000 from 1976.   She's about 30 pounds and came in a heavy (heavy vinyl) case with 8 different foot attachments, 4 different plates, a ruffler, extra bobbins, and a small assortment of sewing accessories.    They had the price listed at $150 and I offered $100 with the agreement that I could bring it back (they were in the neighborhood) if it didn't work well.     Needless to say, my next stop (right after picking up Beau, of course), was the bank for the $100.   It even had the original Instruction and Applications booklets, along with the certificate of warranty for 30 years.   Now, the warranty is expired, but imagine when sewing machines came with a 30 year warranty.  

I brought it home, set it up.   I had to read the booklet to figure out how to thread it.   And .... I'm a really happy camper !   It sews beautifully.     There were a couple of receipts for buttons and zippers for 1990, so I'm assuming this has been in storage for a very long time.   On Monday, I'm going to take it over to the Sewing Machine Shop and have it maintainced and lubed just to start out on the right foot.  

I'm not sure, but I think I just committed to do some sewing !

February 15, 2011

Wish Upon a Star Applique Wallhanging and Food Story 1

 I selected Wish Upon A Star Quilt Wallhanging from my inventory as my next 'Adventures in Sewing' project.     It looked a great beginner pr oject.  

The pattern called for tracing the appliques to make the pattern pieces (versus cutting out the paper pattern), but I photocopied instead.   I discovered a short time later that step is not necessary as the fusible web is fairly see-through and you can just lay it over the pattern and trace.   I managed to get everything cut out and the applique in place before lunch.   The picture has rosy cheeks, and there was not such template ib the pattern sheet, so I just cut little circles.
 After a little practice and a few unmentionable words, I finally got the zig-zag function on my inferior machine figured out got the outline stitching done.
I hauled it back to my workbench to read up on putting in the eyes and the rest of the features and OH WOE IS ME ... I can't find the instructions.    I looked all around my room, at this stack and that.   Went through the recycle as well as the garbage, twice.   Checked the bathroom, kitchen, refrigerator, the other bathroom.   Everywhere I'd been and no ... I can't find.  This type of thing drives me to distraction.   I know that I should be able to figure it out from here, but the plan was to follow the directions, learn what needed learned, before I start freelancing. 

So, it's on the back table, awaiting the return of the instructions.   They will probably be there tomorrow.  

I started clearing my workbench when the CD Changer brought a Simon and Garfunkle song.   This got me to thinking ....

 ~~~~~~~~~~~~~~~~~~~~~~~~~~~~~~~~~~~~~~~~~~~~~~~~~~~~~~~~~~~~~~~~~~~~~~~

I started the 6th grade in El Cajon, Ca, where I quickly learned that the only thing worse than being short and fat, with red hair and freckles, is being all of that while wearing a dress. California girls do not wear the standard dress or skirt to school as did Oregon girls, but instead have fun tops and pants.  Even if we could have afforded these clothes, Mother believed girls belonged in dresses.

Mother and I lived with Penny, her best friend from High School, and her much older daughters, Marcy and Diane.  Fortunately, for me, the apartment was only 2 blocks from my school.  This allowed me, along with a note, to go home for lunch.

I loved being in the apartment alone for that 45 minutes each day.   Typically, I made a bologna sandwich with a side of ice cream.    I'd put an album on the record player.  Growing up, my mother had music; 1000 string instrumental Lawrence Welk kinda stuff.  But Marcy and Diane had lots of other music.   My favorite, at the time, being Simon and Garfunkle.    I'd turn up the volume, much louder than would have been allowed, and I 'd sing.   I knew the words to every song.  I'd sing as loud as the music.  During pauses, I'd have bites of my lunch.    And then, I'd shut it all down, putting the album carefully back into the cover (as I'd never received permission to touch them), and I'd go back to school.

It was one such lunch and I was belting out the 'la la la' chorus of The Boxer, when I realized I wasn't alone.  Marcy had appeared, and without even cracking a smile, turned down the stereo, and disappeared back to her bedroom.   I thought I was going to die.   I thought I was going to get in trouble for playing with the record player.   I thought I wasn't going to be able to come home for lunch anymore.  

That night I waited for the reprimand.   I knew that Marcy would tell her Mother, who would tell my Mother, who would proceed with The Talk.    But, it didn't happen.

Instead, Marcy took up singing The Boxer, slightly under her breath whenever I was around.  And, whenever I came home for lunch,  I checked the rooms before I put on the music. 

~~~~~~~~~~~~~~~~~~~~~~~~~~~~~~~~~~~~~~~~~~~~~~~~~~~~~~~~~~~~~~~~~~~~~~~~

Thanks for dropping by,

Lorrie

February 07, 2011

Vintage 1970s Mens Sewing Patterns; A Stroll Down Memory Lane

Awhile back I picked up a box of Mens Vintage patterns, some from the 1960s, but most from the 1970s.   Being a teen from the 1970s, I'm finding the fashions fun, and some of the models immensely attractive.

This one is fashionably bold with just a hint of arrogance.  Vest, with an optional belt, and pants.

                                                               Vogue 9374 -
This mens caftan is basic, and quite sexy. I like at both lengths and thinks the hood is a great extra touch for use in getting out of the shower.  Shorten it to hip length, add a couple more ties, and you'd have somewhat Jim Morrison tunic.

                    
This is the  very classic Donny Osmond look.  This vest and shirt is what the Mothers wished their sons were wearing.
 
 
Simplicity tried to make this appeal across styles.  We've got a bit of the late 60s bad boy and a little bit of hippie plaid.   These jean jackets come back periodically.   I wouldn't be surprised to see a return soon.


Sew Lovely M36C -
 Okay, so it is a timeless fashion.  Titty Whities do not change much, but the model is such fun.   Notice that he has that fine head of hair and mustache, but not another hair on his body.
 
 Simplicity 5161 -
Cuffed pants are gaining polularity, as is the band and vent on the back of the jacket in this three piece suit.
McCalls 3521
This sports jacket is starting the conversion to the more casual shirt-jacket.  

 
Simplicity 9435
This is a combo pattern (Mens & Misses) with alot going on.   Lace-up ties, long rounded collar, wide cuffs, puffy long sleeves.   There just a little swashbuckler and a little Robin Hood. 


Simplicity 8255
Low waisted, hip-hugging, bell bottoms.   Need I say more?

More Hip-hugging, bell bottoms pants with a little extra - patch pockets and front button fly.


Simplicity 8823 -
This is a great cargo kinda shirt.  But, what had me going was the man in blue with those shorts.   Why did men's short shorts go away?  And, when are they coming back?

Hope yo enjoyed this short Fashion Show.

Lorrie,
 

February 03, 2011

Applique Cat T-Shirt and Pants

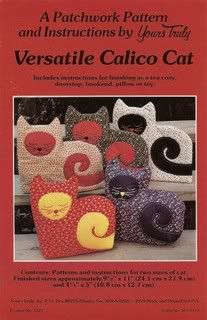
I have several stacks of quilting and craft patterns that I've started going through to list in my shop.  It seems some of these would be a great place to start sewing and have set aside several for consideration.   Then, I picked up this one - Versatile Calico Cats by Yours Truly

This one seemed simple enough.   It's one of those multi-purpose patterns that can be used to create anything cat related from an adorable wall hanging to a doorstop.    At first I was thinking about trying a simple pillow.  BUT, I don't really need a pillow.    Then the thought started, I'll start real simple and make an applique T-shirt for Lilly (for her Valentine box).     I don't quite feel up to sewing a t-shirt (don't I need a serger for that?), so I made a quick trip to K-Mart and picked up a couple packages of Toddler Undershirts. 

Back home, I selected some green Calico Fabric, of which there is about 3 yards.   This excess fabric led me to decide on a pair of bottoms to go with the top.   Having a couple thousand patterns in the house makes this type of decision quite easy.    I decided on Simplicity 8213, primarily because it had the elastic waist (easy), it was the right size and it is already cut.  
Then, here and there over the next four hours, I did it !   I sewed a little pair of pants with a t-shirt that has a matching applique.  

The pants seem huge.   I hemmed them up further than the pattern called (look Ma, I'm already doing alterations!), but I'm afraid they will be huge on her.   But, I'm pleased that I conquered both these simple projects with no major issues.   

Okay, what next ????

January 27, 2011

McCalls Advertising Page Embroidery Sewing Patterns

I am what you may call a 'Stacker'; loose odds and ends of books, magazines, loose papers are stacked in a corner of my studio beside the printer. They all have a purpose. Sometimes it's something I want to try, think about, or just don't know what else to do with at the moment. Right now, the stack must be close to two feet tall. But, that really is beside the point.

Yesterday I was digging through the stack and came across this single piece of paper.  My guess is it came out of a lot of patterns and was simple put into the stack. 

Some of the pattern numbers at present over at Wikia Vintage Patterns.  Based on that, the page must be from early 1940's as I've found dates between 1937 and 1942.      

This is delightfully fun !    Enjoy.

Lorrie


Two Birds Art Quilt Practice

Here's the second painted applique piece I put together the other day for practice.
It's smaller, about 10 x 8.5"  Again, same thing ... lightly painted fabric and some applique inspiration from Summer Garden Quilt pattern, which I've now drained of inspiration and placed in my shop

I stitched in the birds, the rails and some free form color here and there amongst the paint.

I was surprised how dramatically different they look .... the difference being the camera (first pic), and the scanner (second pic).   The scanner dramatically washes out the color.

As I was working on the birds, the term thread painting popped into my head  and I took a quick break to Google it for tutorials.   I, just as quickly changed my mind.   I definitely don't have the right equipment and setup for that, at this time.   But will put it on my consideration list for that new sewing machine sometime in the future.    For now I'm content on playing and experimenting with the fabric.   I'm looking for my style.   I've also set this one aside, and will come back to it later when I'm ready to experiment with finishing techniques.   Other than that, it is not a keeper.

As I worked, I found myself thinking about how, in my mosaic days, my centerpieces were typically in threes.   I always equated that to be three of us.   I noticed, that I now seem to be doing things in Two's.  How interesting that this evolves ... empty nestors and the subconscious mind.

Lorrie,


January 25, 2011

Art Quilt Stitching Practice

As I was stitching yesterday, I noticed that my machine did not mess up once ... no dragging, no tension issues.   Perhaps it knows I've been talking bad about it.  

I decided to continue right where I left off and pulled out the same brown patterned fabric used in the first practice session.   I cut two smaller pieces; added bits of watered down acrylic paints and let them dry.    
Here I have two appliqued flowers and 10 leaves with batting only on the back.  As I was laying them out the name of Standing Guard kept jumping out at me, but I'm certainly far from having anything worth naming quality.     I added stitching to, of course, the leaves and the flowers, as well as freeform stitching here and there to compliment a few of the paint strokes.  
 The stitching is not prominent enough to much tell at a distance.     So, I layed it on the scanner bed (what would fit anyway) and it picks up a bit better.

I'm stopping at this point.   (I'll set it aside for practice when I start on finishing techniques).  What did I learn
  • My focal applique pieces are not enough contrast to the background paint.  
  • My stitching does not even begin to draw out the features.   

Practice will continue; I have the second piece of semi-painted fabric, which I'll start practice tomorrow.

Lorrie

January 20, 2011

Brother XL3500 Sewing Machine and Continued Quilt Practice

If I decide I'm going to sew on any kind of a frequent basis, whether it be clothing or art, I'm going to need a new sewing machine.   

Now, in defense of this sad little machine, Brother XL3500, I bought it with the idea that I was going to play with some paper quilting collage and needed it for texture and effects.  I had previously used a machine I inherited from a mother; an inexpensive machine from the 70s that had never had it's finer moments (from my distant memory, she called it alot of different names ... none of them that kind).  I listed it on Freecycle and it was gone really fast.

To pick this machine, I spent a fair amount of time online reading reviews and had reached the decision that this one, for the $129, would meet by paper collage needs.   I realized that the site I was planning on ordering, Precision Sewing, was only a couple miles from the house (go figure the odds of that!).  So, I called them up to see if I could place my order and just drive over and pickup.   I always like the idea of bypassing shipping charges.    The man I reached, after a considerable hold, was what I would call .... UMMMM Really Rude.   He told me that I shouldn't waste my money on a piece of ***** like that and if I wanted to buy a real sewing machine that I should come in and he would help me out.    When I insisted that I wanted this machine, it would my needs, he said they didn't carry it.   (Like why was it listed on their site anyway?).    Needless to say, I was somewhat perturbed and immediately ordered it online from another company and paid the shipping.

When it arrived, I assigned it a designated place in my studio.   I played with it a little, a couple pieces a paper collage, a dress for Lilly, some clothing repairs.   Not much.   Now, about this machine.   It mostly reminds me on when my son was a teenager.   It's hard to get going.  I don't know what you call it, but if its been more than a couple days, you have to manually turn the wheel for several minutes to get it started.   Then, it takes many opportunities to get jammed up on the way.   And, on top of that, it only fills the bobbin half way, making necessary stops every time you get it going well. 

Now, I have an online shop, Todays Treasure, with close to 3000 sewing patterns in inventory and at least another 1000 waiting to be added.   I pick up some of these and have all the ohhs and ahhs of a seamstress.  Just not the talent.  Perhaps, it's time I relearned to sew.  Beau offered to buy me a new one (of my choosing) for Christmas.   I told him, however, that  before I decide on a machine, I should decide just what I'm going to do with it.     Then, perhaps, I'll only have to buy one more machine, versus go through this particular scenario over and over. 

On another note, I continued working on yesterdays practice session.    I fused the applique to my painted fabric, cut out backing fabric and batting and sat down to start the stitching work.     I didn't get too far and what was wrong become obvious very quickly .... it's bunching up.    I decided this was a result of having back the backing sheet on there.    This one I'll toss, and start over again.  


January 15, 2011

Simplicity 7607, Basic Vest Sewing Pattern, Full of Long Lost Memories

I was processing patterns (something I do an hour or two each day), and I came across this one - Simplicity 7607.  
 This was simple to process, just four small pieces and a page of instructions.  Super simple beginners pattern.   Then as I was recording the envelope condition the words caught me -- Paula Hundle 4th Hour.     And there I went .... back to 1970.

I'm in the 7th Grade at El Cajon Valley Junior High.    This was the first year in my school life that I am allowed electives.   I studied the choices and had my heart so set on Wood Shop and Art.  But no, my mother required (as she would continue to do), that I take:

  1. Sewing; because buying purchased clothing was expensive, and 
  2. Typing so that I would have something to fall back on later when my husband left me and I had children to support.
And sewing and typing it was.   But, this entry is about the sewing .... I'll tell you about the typing some other time.

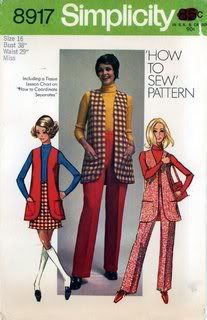
So, sewing it was.    The class (about 15 or us per period, I believe), had an assigned pattern to make.   It was for a skirt and vest combination.    It was this pattern - Simplicity 8917.
Mom and I went shopping for the pattern and materials.   Shopping for us was always a painful experience, we never agreed on much and she liked to look at everything and I was more the grab the first thing and dash kind of person.    Finally, 'we' selected a white, brown and red plaid  type fabric.  I'll never forget it.  
 
And then, for a couple months, about 45 minutes each period, we discussed sewing, learned to use the machine, cut out the tissues, finally the fabric and then began stitching it all together. 

I don't remember hating sewing class until the day, when we were almost done, the teacher made her big SURPRISE ANNOUNCEMENT.   All the sewing classes, who were making the same pattern, were going to have a BIG FASHION SHOW in the Auditorium.  in front of THE ENTIRE SCHOOL.  

Now, what I've failed to mention, was that I was SHORT, overweight, PERHAPS FAT, with RED HAIR and FRECKLES that led a life of their own all over my face and arms.   Or, in other words, I would rather have died than paraded in that plaid outfit, that made we look like a brick firehouse.

As the day approached, I tried to explain to Mom that I couldn't do it.   Everyone would tease me and I would be humiliated, but she gave me the typical OVER REACTING line, and went back to napping through Merv Griffin.

Each day dragged slowly by as we mastered the zipper and the hem.    (Did I mention the days dragged by).   And then, the end of the semester happened; just like I knew it would.  


It dawned a bright and sunny day, of course.   Fortunately, Mom had to work and wasn't able to to come to our fashion show.    The morning lasted an eternity.   And then, right after lunch, all of us 'sewing class' girls went to the gym and put on our outfits and proceeded to the auditorium (aka cafeteria).    Now, I suppose that I wasn't the only girl not looking forward to this.  But I don't really know. I didn't have any friends in the 7th grade; they were not something Mom looked favorably upon.  I now wish I had a picture to show you; but to my knowledge, one was not taken.

We were lined up single file, and one by one, about a minute apart, we walked out onto the stage, made a turn around, and walked to the back where we were set into rows.  When my turn came, I dragged out.  There were of course, some laughs, and a few mean remarks hurled towards the stage by the up-and-coming guys and hip girls.    I wanted to die, but I made back to my spot in the rows.   And then, it was all over and we were dismissed to go back to the gym to change.   I went home instead.    School never asked why I didn't go to afternoon classes, and Mom didn't remember at all, but just came home and snoozed through Merv Griffin.  

I never took another sewing class.

Which brings me back to Simplicity 7607.   Other than being slightly dogeared, the pattern is in perfect condition and awaiting some beginner sewer wanting to make a slightly mandarin looking vest.    Who-ever you are Puala Hundle, I hope it was an okay experience !


January 05, 2011

Hoodie Jacket Re-Do

Two years back we went to California for vacation and did the Coastal drive.   The weather was much cooler than we anticipated and we made a quick stop by a Target to pick-up something to keep us abit warmer.   For me, that was a plain Hoodie Jacket, that I recall, was on final clearance for $4.  (it being May and the demand for Hoodies apparently being low).  It did a good job.  When I got home, it was placed in the laundry closet, along with the other 'seldom worn' jackets.   Fast forward almost three years and I started the task of cleaning the closet.  (Still dabble in my downsizing concept .... with very little progress).   I tossed the Hoodie in the 'Give Away' box, then, started having second thoughts ..... maybe a Re-do is in order !



A couple hours later .... Hoodie Jacket Re-do.   Now, I know this isn't going to win any prices, but I will, most likely, wear it once in awhile.   AND, it felt really good having a creative thought.

Completion of the closet awaits some other day.


September 25, 2010

Just Like Moms' Electric Sissors

Last year I added a pair of electric sissors to my Christmas list.   I thought if I ever started any real 'sewing' (you know, versus the pretend) they would come in handy.    Beau bought me a pair online that he claims he even researched and they had good reviews.   The did a real good job cutting paper; but anything more than 1 layer of lightweight fabric, was out of the question.    I decided to keep them, however, as I do periodically go off on paper cutting spells. 

Sometime, earlier in the year, I brought home a big box of fabrics.   Stuck down in the box was a pair of electric sissors.    Although I didn't check to see if they worked, I tucked them away in a cabinet.

The other day, I was processing patterns for the Todays Treasure shop and I came across New Look 6720 and thought I'd make myself a pair of these wonderfully comfortable looking shorts.      I selected a piece of maroon, lightly pattern fabric from the cabinet and then, remembered I had the electric sissors.    Out they came.


Now, these sissors are quite old, evidenced by the lack of a polarized plug.  I cut out and pinned down the pattern and plugged in the sissors.   With great anticipation, I pressed the 'Geaux' button.

I remember in my early teenage years, Mother had a pair just like these, except they were pink; and I was never allowed to use them.   When she had the time, she loved to sew.    She layed the fabric out, and it seemed, just when I was watching something really great on TV, she'd turn them on and the loud HUMMMMMMMM, accompanied the the vibration from the tabletop, would drown out everything.   Well, maybe it's a slight exaggeration, but, they were loud.   Just like these.   And, not only did they make that vibrating I sound I recalled, I could feel the vibration in my hands.    And, do they cut ?   Why yes, they do.   Wonderfully.    The only deficiency I can find is the light doesn't turn.    I'll have to see if these tiny bulbs are still available. 

I image someone became to old to sew, or perhaps past on, and their loved fabrics were put into a yard sale.   Perhaps they were sad; perhaps they didn't care.   But either, whoever you are, I love these sissors and promise to put them to good use.  


August 21, 2010

Fabric Beaded Necklace, No More

A couple times last year, as you may recall, I created Fabric Beaded Necklaces from a variety of vintage scarves and fabrics.     I took these with me to a couple craft fairs and then put in my CTStudios shop.      A couple sold at the art/craft fairs, and although they garnered a lot of views in the shop, their were no further sales. 


I've been thinking about these for awhile ... along with the charm and fabric bracelet items in my shop.   I mostly think that they are out of par with what I create.   They were a fun little sidetrack, but largely not what I'm about, or what I create.    So, I decided to just get rid of them and then I wouldn't have to ponder the thought any more.     Kind of like one more act of downsizing, I suppose.  

So, I pondered the options ...

  • Garbage ... well no, they certainly do not warrant that extreme of a measure ...
  • Donate to Grans or Restore .... good option 
and then ..... I was thinking that the other thing on my list today was to get a box ready to ship the Big Blue Rose Vase to my sister.    And, just like that, the answer.  

I took all these sweet little fabric beaded necklaces (that, honestly, probably went out of style in the 90s ... I'm always just a little bit out of date) and stuffed them into the Vase!    I'll send most of them to my sister.    (She is a psychologist at a Veterans Home (Men & Women), and I thought, perhaps, she could give them out to some of the ladies when they were in need of some cheer ... or give to her local Goodwill, or whatever.  I put two in my closet ... perhaps I'll wear them someday, and I put two in Lilly's future dress-up box. 
Whew ... closed up the box and felt so accomplished .... one more act of downsizing and no more seeing something in my shop, that really doesn't belong there.  

July 16, 2010

Daisy Flower Pattern Becomes a Barbie Doll Hat; Tutorial

I keep a variety of the patterns I bring home for my personal interest or use. I was going through the box this afternoon when I came across this loose pattern piece ... (McCalls 3863).   I checked and I didn't have the actual pattern; just the one sheet. 

It says Daisy Trims, and I decided it was to make a Daisy shaped flower and thought, perhaps, I'd put an old vintage beaded earring in the center and make a brooch for my sister.   

So, I pulled out some felt and started on my own interpretation of how this would go together; and quite quickly, while putting in the 8 sets of darts, realized how wrong I was.    I went online and found the pattern in another shop; it's simply a decoration to go on a tablecloth and the marks were not darts, but cutouts.

Then, it hit me; with all those darts bringing the edges inward, it would make a great hat for Lilly's Barbie Doll.   So, I made three.   It's very simple; comes together in less than 10 minutes.   So, if you have a little girl in your life who loves to dress her Barbies ....
On mine, blue has wide darts, which makes the hat fit Barbie almost like a stocking hat, the black brown print has medium darts, making it fit her perfectly and the yellow is quite a floppy hat.    She looks great in all three!

Tutorial ...

  1. Cut a round circle from a piece of felt between 3" to 3 1/2" across.  (The bigger the circle, the floppier the hat). 
  2. Mark a circle about 1" to 1 1/2" in the center.  The will become the area that is the crown. 
  3. Mark and sew your darts.  (I simply used a ruler and marked off into 8 quadrants ... being precise is not necessary).   The smaller you sew the darts, the looser the hat will fit.   
  4. Put either a straight or decorative stitch around the edge to hold the darts down.  

Embellish any way you wish.   I used beads and buttons on the crown of two and just decorative stitching on the third. 

May I'll make her outfits to go with them.  I still have the Barbie pattern out.